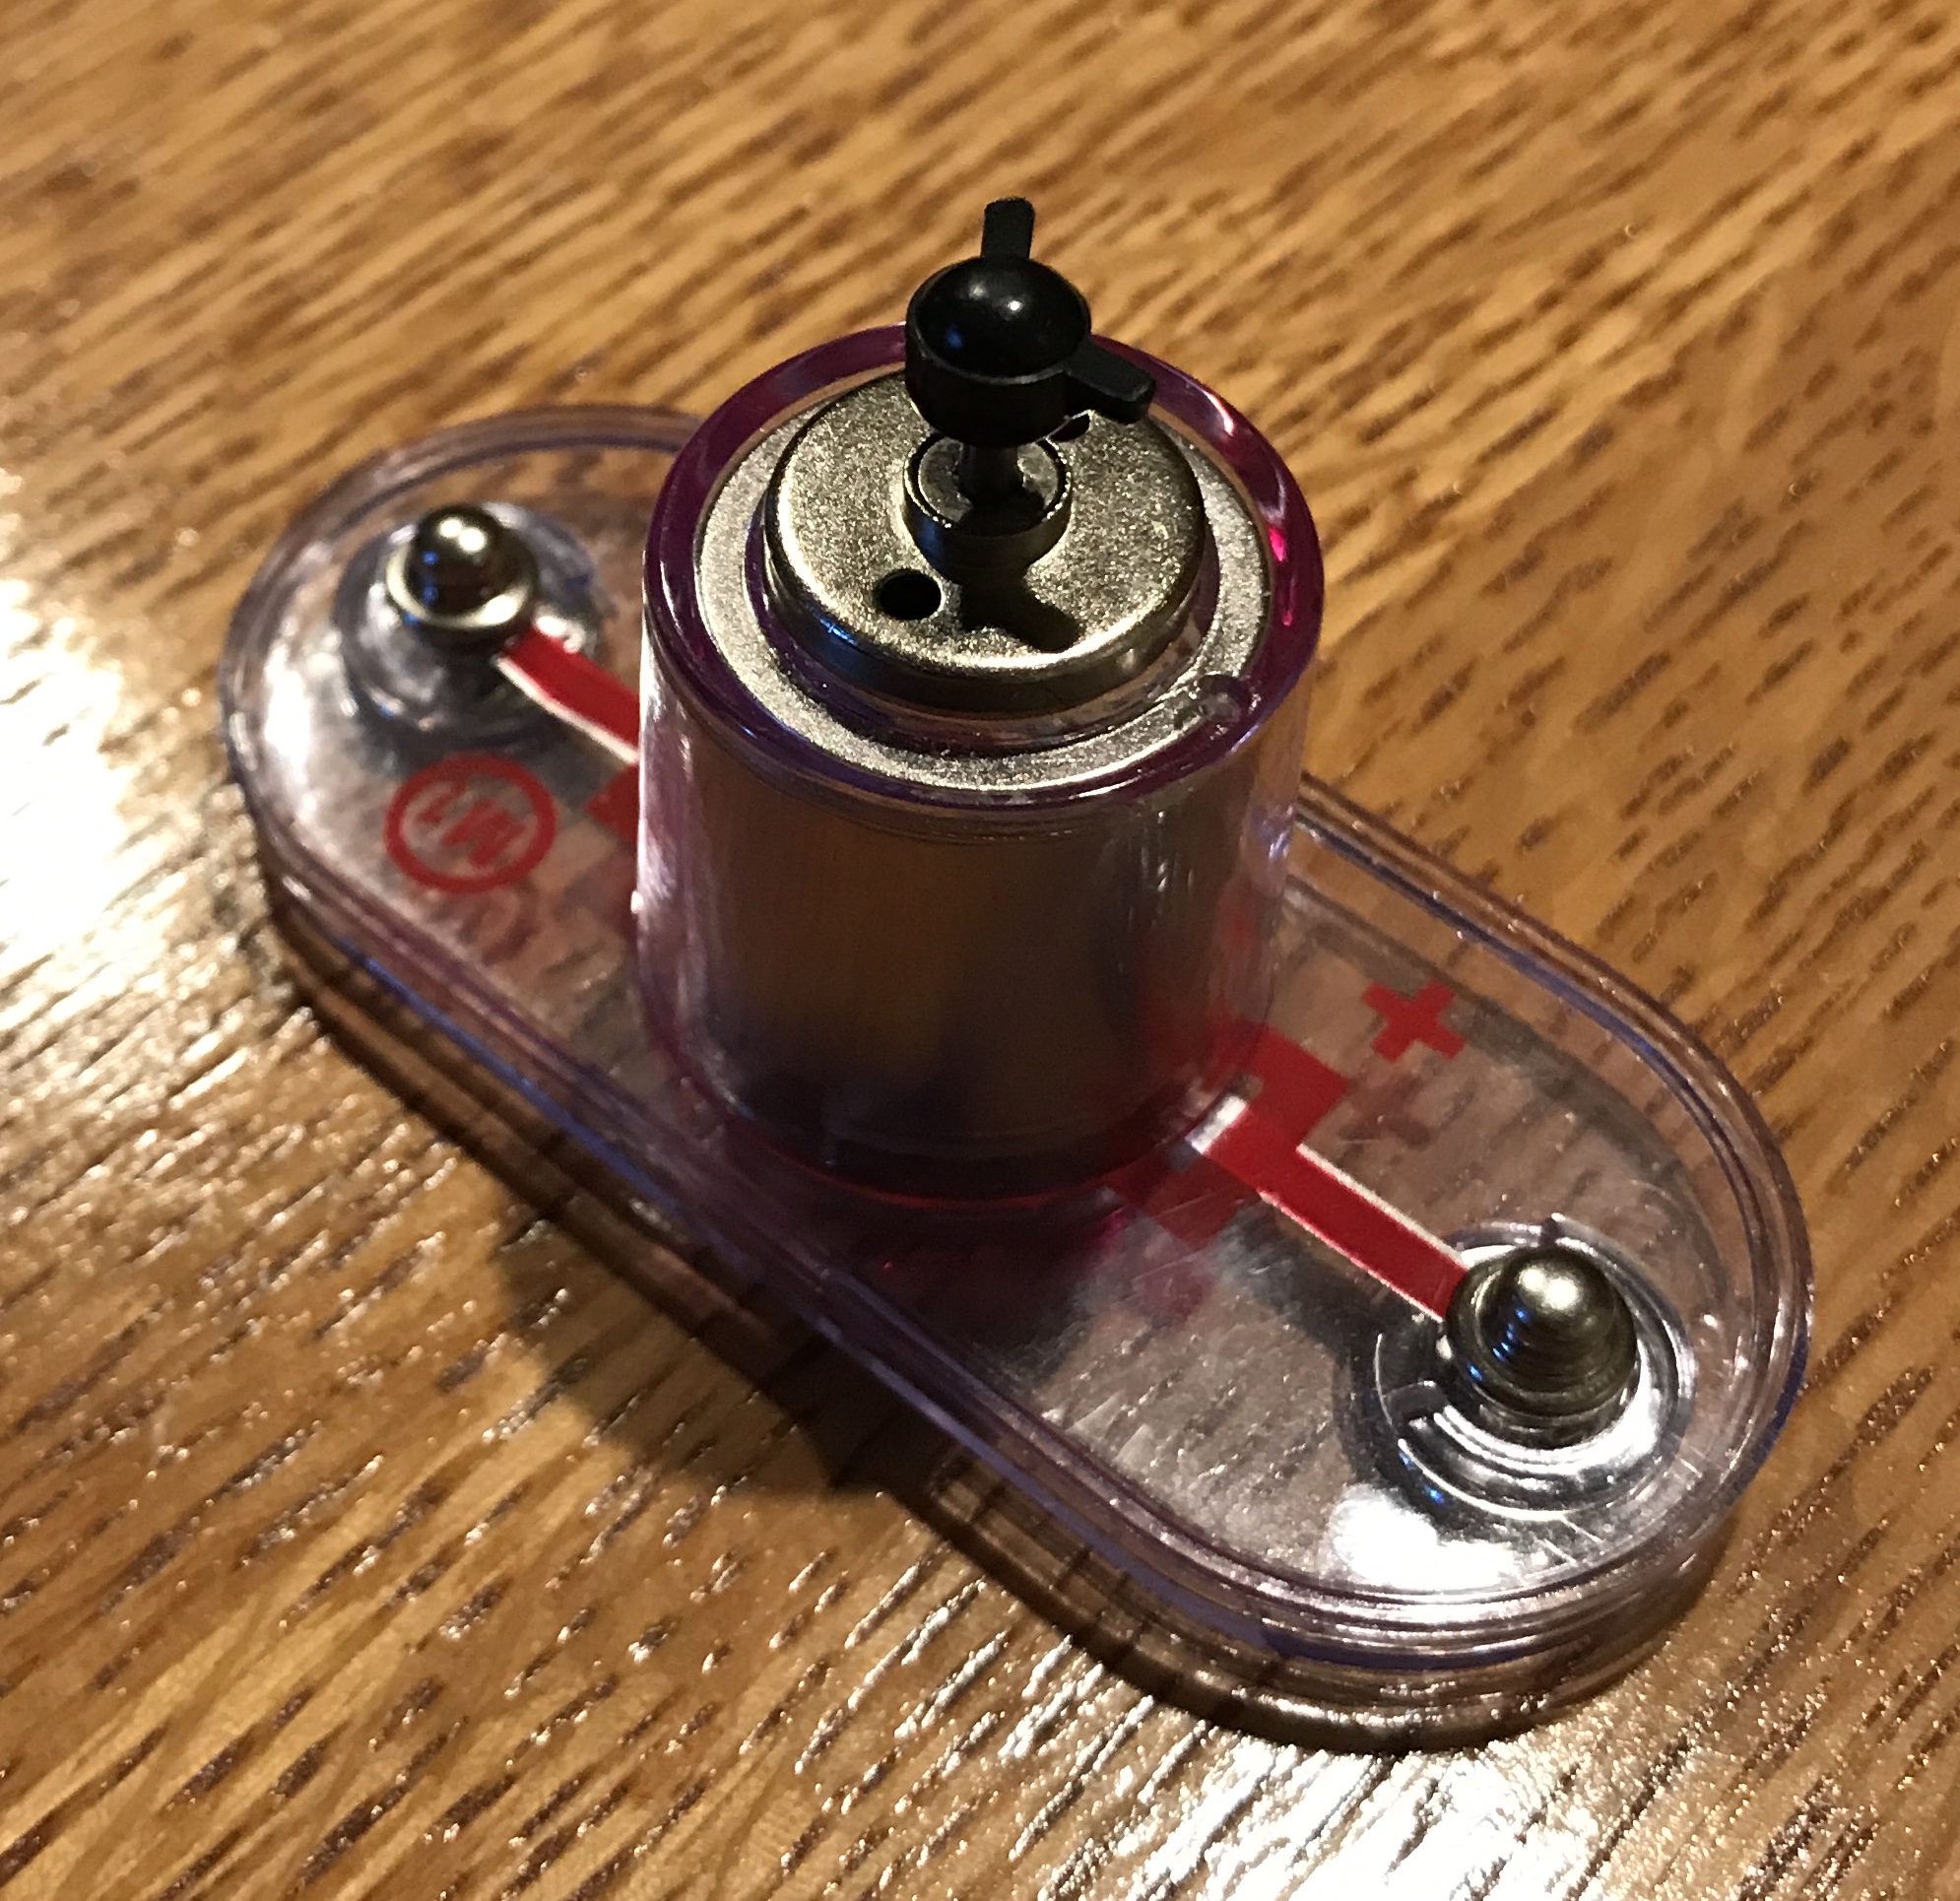
Levi received an electronic kit. It includes a small motor and a helicopter-like device that will fly up in the air as the motor spins it up to speed. The motor shaft has a small plastic knob on the end with three prongs on which to set the helicopter. One of the prongs had broken off and Ryan asked me to fix it. A picture of the broken piece with two of the three prongs is shown below.
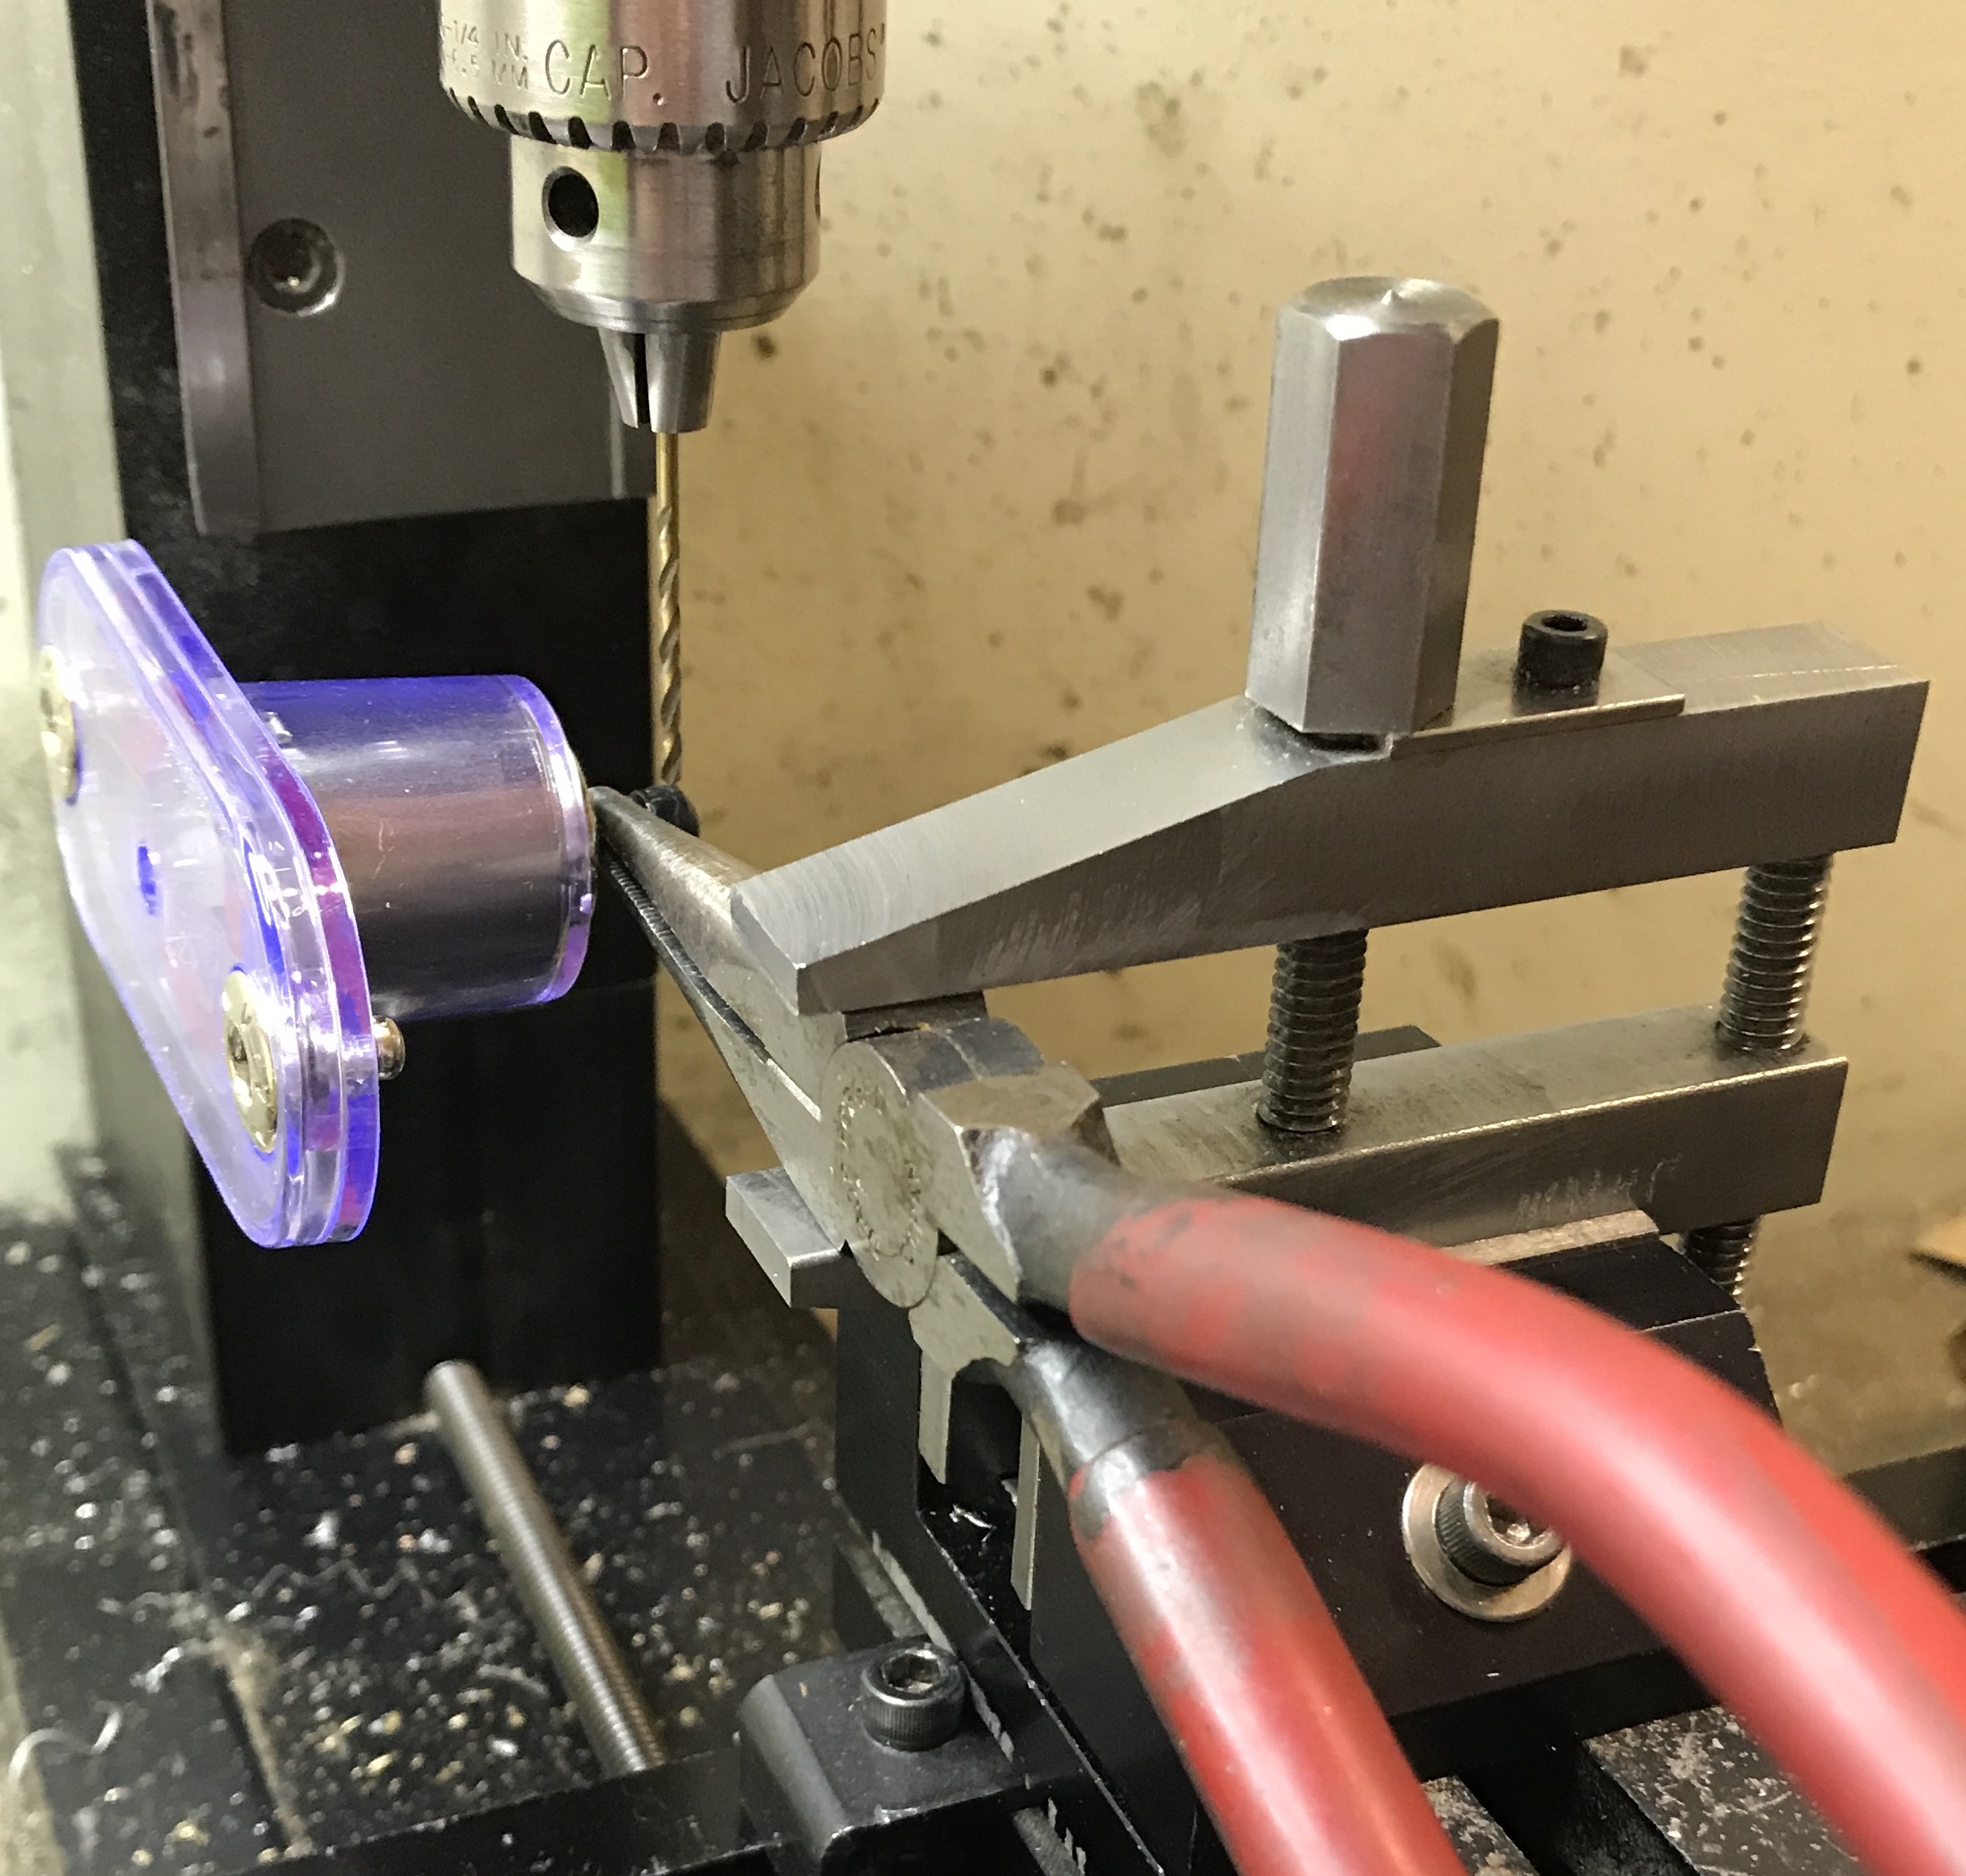
The first challenge was figuring how best to clamp the knob so it could be drilled. I do not have any clamps small enough to clamp the shaft. The needle nose pliers fit well and gave a good bite on the shaft. After gripping the shaft and aligning the knob the needle nose pliers were held shut with a machinist's clamp. This clamp was then placed in the vise in such a way that the spindle of the mill could be centered over the knob. A picture of this jury-rigged clamping system is below.
The prongs were measured at 1/16" wide and 1/8" long. The drill was first aligned with one of the remaining prongs and then centered across the width of the knob. The knob was drilled with a 1/16" drill to a depth of 1/16". The drill was run at a high speed and the drilling was done in small increments. A fine string of plastic was observed without any obvious melting.
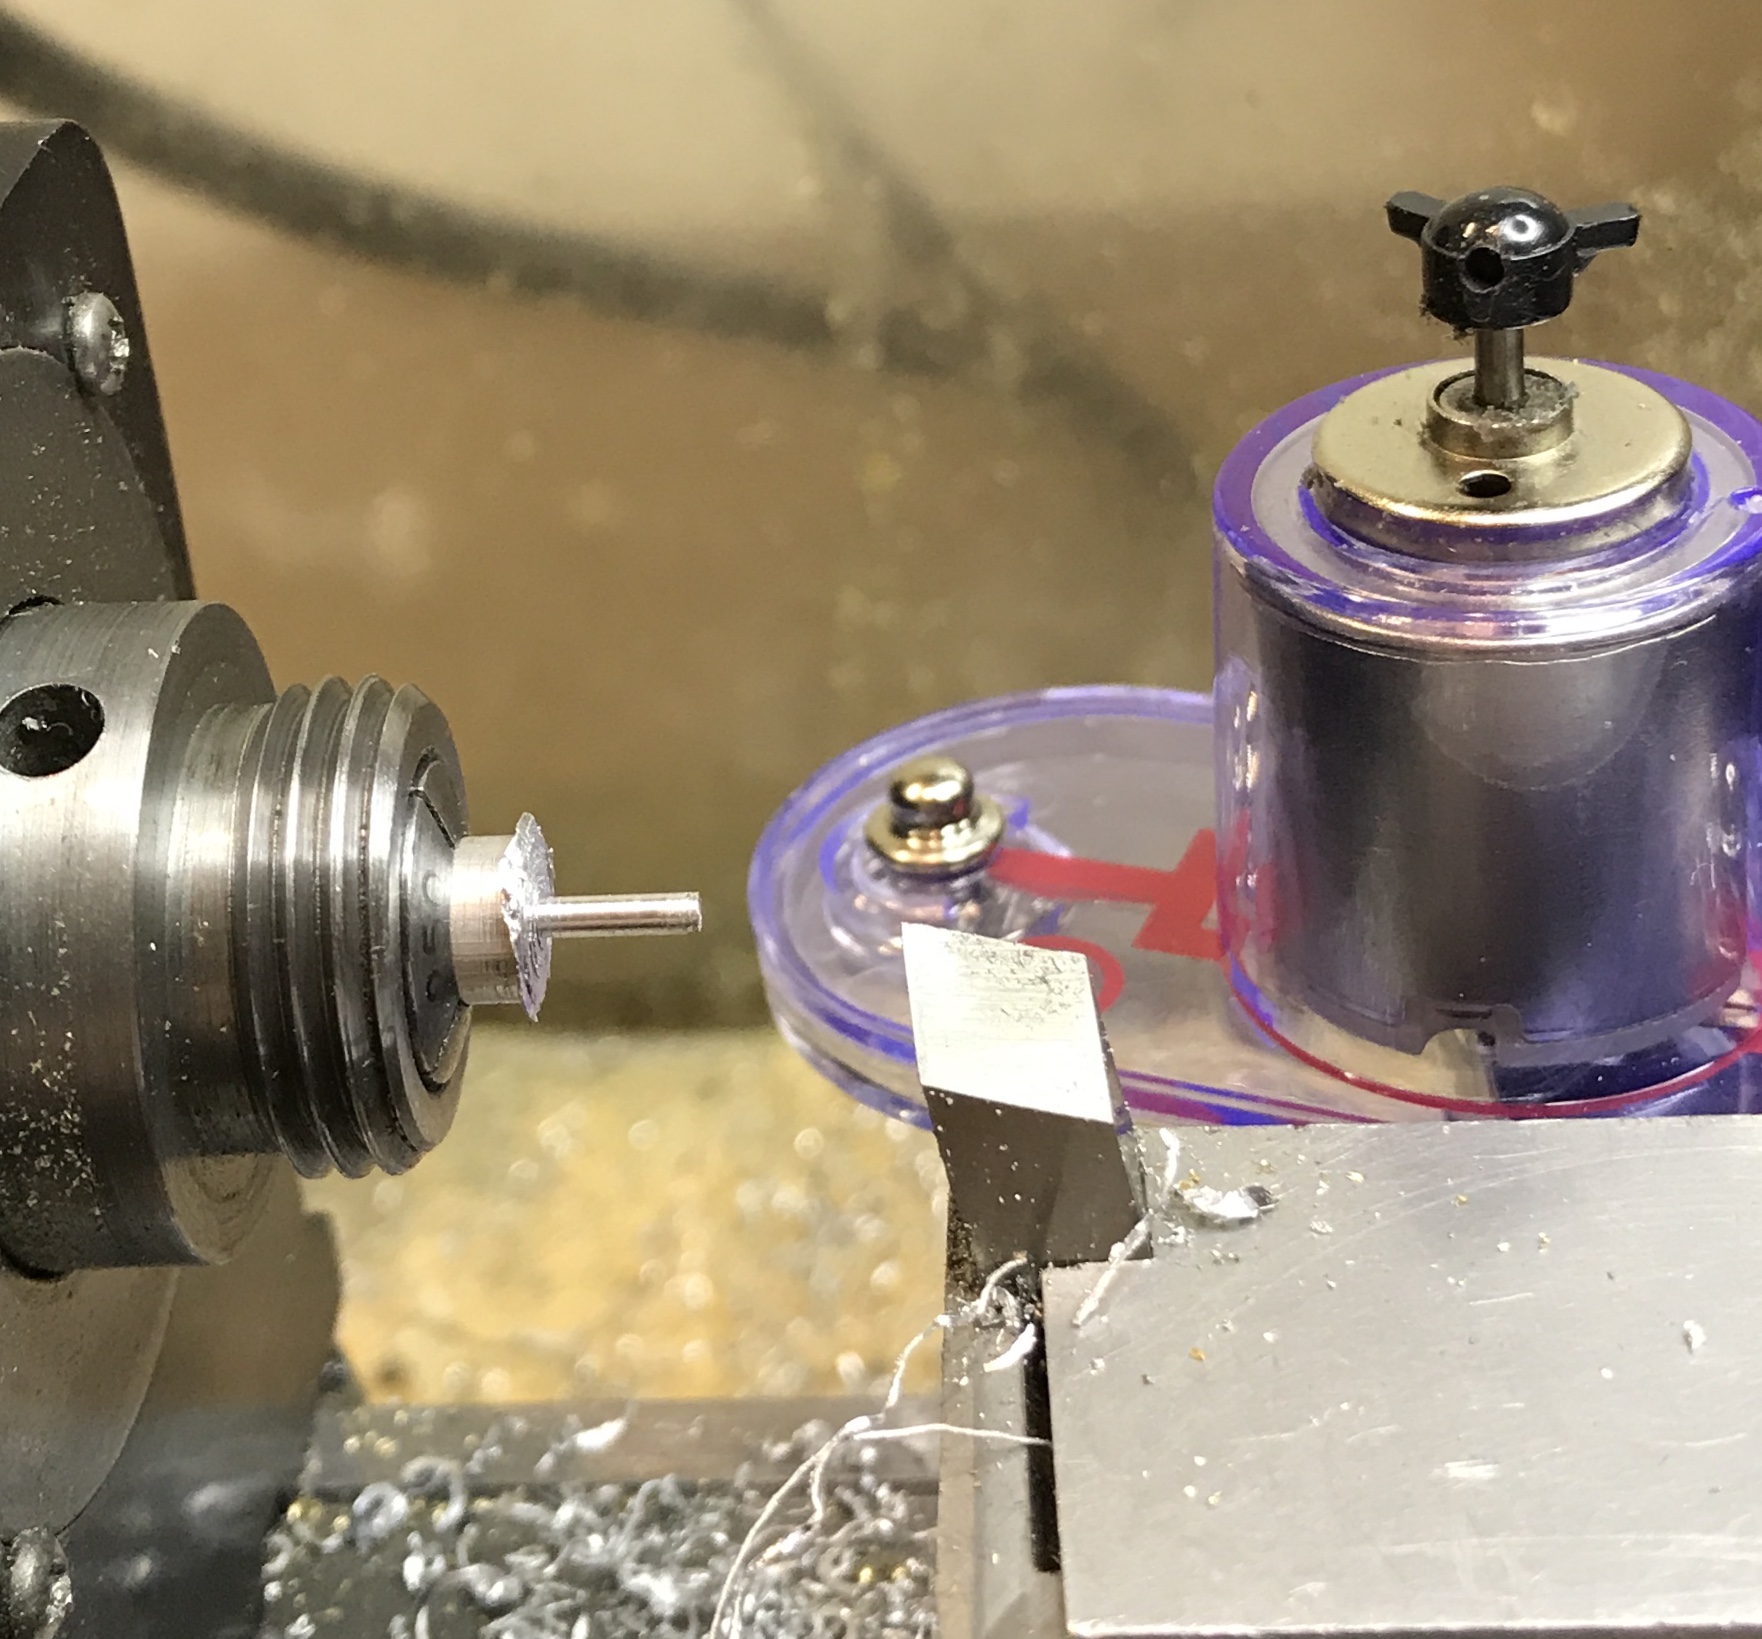
Attention then shifted to making the prong. A 1" length of 1/4" aluminum round was held in a collet. It was faced and the diameter was reduced to 0.061" for a length of 0.25". The end was lightly chamfered with a file and then about 1/16" of the end was flattened with a file to mimic the top side of the prongs. The aluminum prong was parted off at 0.188". The end was cleaned up and slightly chamfered with a file.
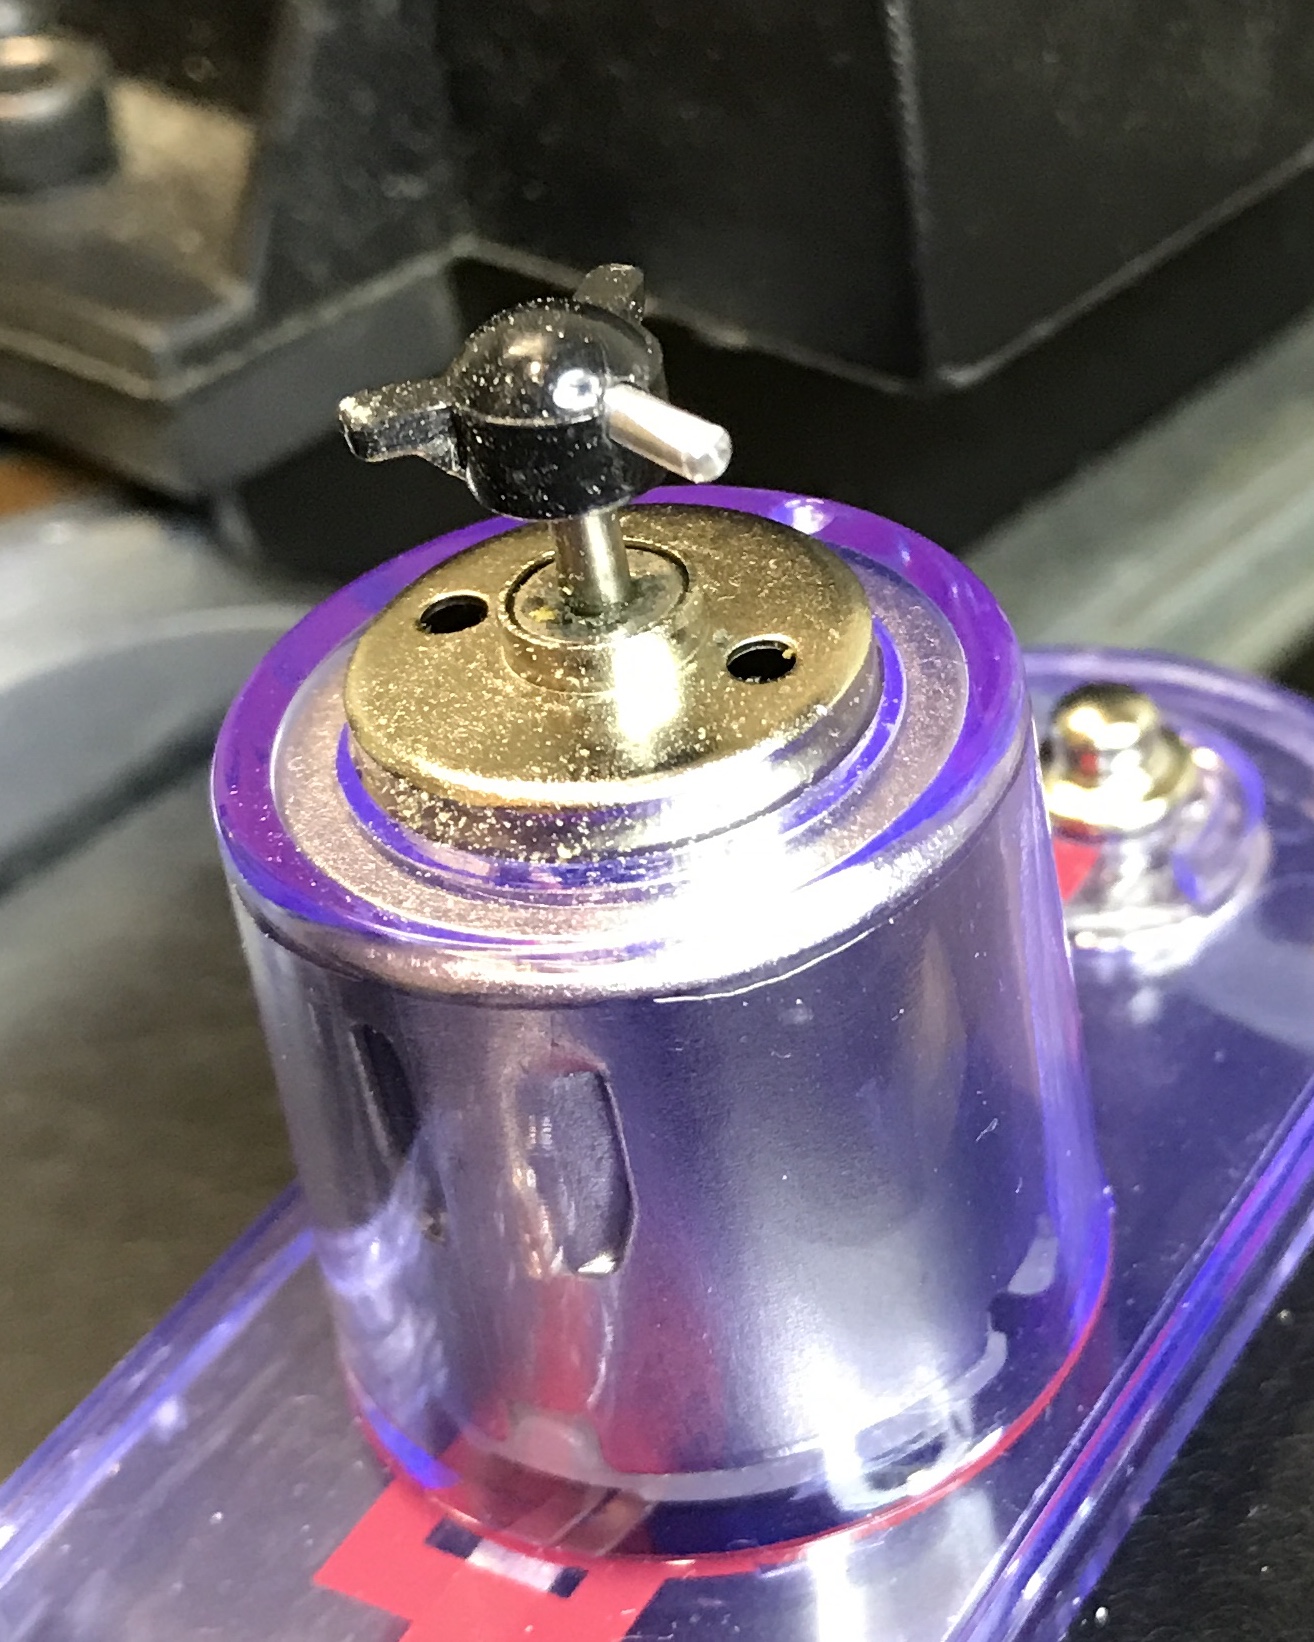
An adhesives chart, saved in DevonThink, recommended either a contact adhesive or a two-component adhesive. I don't have the former, but do have a two-component epoxy. A small amount of this was made up on a wooden block and some was placed in the drilled hole in the knob and some was placed on the end of the new prong. The prong was inserted into the hole and left to dry for a few days. The picture below shows the prong glued in place.
